前言:
為何我會選用Hxeo來當作Blog框架?
有下面幾個原因:
- 因為建立於本地端,所以可以更方便離線進行編輯
- 使用
Markdown語法撰寫Blog,更方便、通用、容易上手 - 搭配線上
CICD工具部署於Github上,完全零成本 - 中文文件資源多
- 支援多樣不同樣板,可隨心所欲切換風格
- 開源社群活躍
- 基於NodeJs擁有豐富的差件
建立自己的Hexo
安裝 Node.js
首先先安裝 Node.js 官網下載安裝
安裝完後使用CMD
node -v
npm -v
查看是否安裝成功.
安裝 Hexo-cli
使用 npm 來安裝 hexo (須先安裝 Node.js)
npm install hexo-cli -g
因為我們之前就有建立一個Code Blog Repository.
我們使用CMD 的 CD 命令進入此資料夾目錄中
在使用hexo cli幫助我們快速建立Blog相關檔案
hexo init blog # 初始化 blog
npm install # 安裝相關套件
如果要把Hexo deploy到Github上面,需要先安裝
npm install hexo-deployer-git –save
Hexo config.yml 設定說明
Hexo 是使用yml檔案格式來當設定檔.
hexo init blog # 初始化 blog
資料夾檔案結構如下圖:
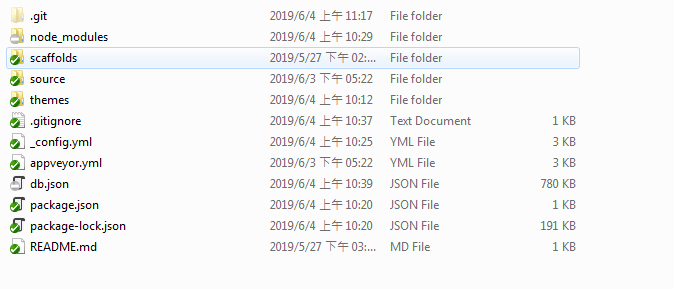
當在Blog Code Repository 中建立完Hexo資料檔後會有一個_config.yml檔案,就是Hexo的設定檔案.
解說 config.yml 設定檔
預設頁面:
title: 石頭的coding之路   #網站標題
subtitle:
description: 好點子沒價值,有價值的是把好點子實現 #網站描述
keywords:
author: Daniel Shih #您的名字
language: zh-tw  #語系
timezone:        #時差

# Header
menu:
Home: /
Archives: /archives
About: /about.html
Tags: /tags
Categories: /categories
路由設定:
# URL
url: https://isdaniel.github.io/ #網站的網址
root: /  #網站的根目錄
permalink: :year/:month/:day/:title/
permalink_defaults:
資料檔設定:
# Directory
source_dir: source #原始檔案資料夾,這個資料夾用於存放您的內容 預設值 source
public_dir: public #使用Hexo g 產生靜態檔案資料夾名稱
tag_dir: tags #標籤資料夾名稱
archive_dir: archives #彙整資料夾名稱
category_dir: categories #分類資料夾名稱
code_dir: downloads/code
i18n_dir: :lang #語言資料夾名稱
skip_render:
文章設定
new_post_name: :title.md #新文章的檔案名稱
default_layout: post #預設佈局資料夾
titlecase: false # Transform title into titlecase
external_link: true # Open external links in new tab
filename_case: 0
render_drafts: false
post_asset_folder: false
relative_link: false
future: true
highlight:
enable: true
line_number: true
auto_detect: false
tab_replace:
配置index2 generator
index2_generator:
per_page: 10
order_by: -date
include:
    - category Web
exclude:
    - tag Hexo
Hexo 時間格式
# Date / Time format
## You can customize the date format as defined in
## http://momentjs.com/docs/#/displaying/format/
date_format: YYYY-MM-DD #日期格式
time_format: HH:mm:ss #時間格式
Hexo 主題設定
# Extensions
theme: next #使用主題名稱, 設為 false 表示關閉主題功能
發佈資料設定
# Deployment
## Docs: https://hexo.io/docs/deployment.html
deploy:
type: git #發佈使用版控類別 使用git
repo: https://github.com/isdaniel/isdaniel.github.io.git #發佈到哪個Repository
branch: master #發佈使用的分支
社群資料設定:
# Social Accounts
instagram_url: https://www.instagram.com/dn_shih/
github_url: https://github.com/isdaniel
email_url: dog830228@gmail.com
設定檔可以參考我的_config.yml檔案
或是也可以參考官網
Hexo推薦Theme [Next]
Hexo有眾多Theme可以選擇,我們要切換使用的Theme只需要做幾個步驟.
- 在網路上尋到想要使用的Hexo Theme.
- 把資料檔放在
/themes/資料夾目錄下.
這次想要跟大家介紹我使用的Next Theme,我會使用原因如下
- 擁有眾多開源者貢獻
- 畫面乾淨又整潔
在Hexo使用Next
- 我們把上面的Next Theme clone一份下來.https://github.com/theme-next/hexo-theme-next.git
- 在
/themes/建立一個next資料夾並把Next Theme所有檔案copy進去. - 修改Hexo
_config.yml檔案,把theme改成next
Hexo推薦插件
下面是我推薦大家使用的Hexo插件,使用說明我就不一一跟大家解釋了網路上很多分享文.
- theme-next-reading-progress 閱讀進度.
- hexo-symbols-count-time 閱讀次數
- hexo-generator-index2 頁面分類
- hexo-related-popular-posts 熱門文章
- hexo-addlink 在文章最末添加永久鏈接及版權聲明
此文作者:Daniel Shih(石頭)
此文地址: https://isdaniel.github.io/hexo-blog-theme/
版權聲明:本博客所有文章除特別聲明外,均採用 CC BY-NC-SA 3.0 TW 許可協議。轉載請註明出處!
